Last issue, Martial Ferré explained the technique for Block 7 (HERE). This week, Block 6, Star – Star, including a video of him describing each stage of the block – you may like to go straight to the end for the video…
General Block Talk
Block 6 looks simple. It is simple. The fact is that the concept of the block is very simple. People think that dealing with just a 360° turn should not be a big problem. People sometimes don’t realize how much hard it is to turn right on place and fast! This block has been existing in the dive pool for a long time now and the technique of this block has followed different influences throughout the ages.
One major technique in the 90s was to turn this block by making the pieces translate [move in straight lines] very hard. Personally I have never believed in these translating techniques (even if I was not doing 8 way in the 90s!), I have been a hard defender of the dynamic turns in place. It might come from my technique in 4 way when we won the world meet in ’99 with team Perris Maubeuge, when we were turning most of the blocks hard in place when other teams were still trying to translate the pieces (eg, block 21 or 8). I have always thought that the degrees of rotation have to be made anyway so why not do them fast instead of cheating on these degrees with cautious moves.
the degrees of rotation have to be made anyway so why not do them fast instead of cheating on these degrees with cautious moves
The technique of translating the pieces in the 8-way block 6 has always brought collisions between the pieces when it’s not well done. With the French team, in 2002, we decided to forget this technique of translating the pieces and we chose the technique of turning in place. We left behind the technique where we were trying to go for the donut intermediate picture after a straight forward move of the insiders. For this block, the pieces need to think of flying into a closed ring – imagine you bring the wall of the tunnel into the air! Fly close to this imaginary wall and the pieces will not escape. This is the technique that I’m trying to explain about block 6 now…
Fly close to this imaginary tunnel wall and the pieces will not escape.
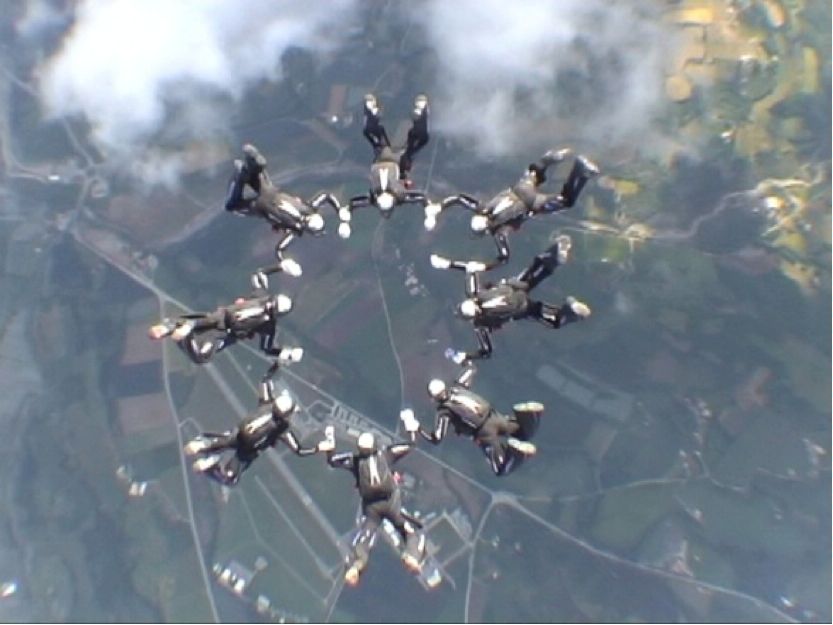
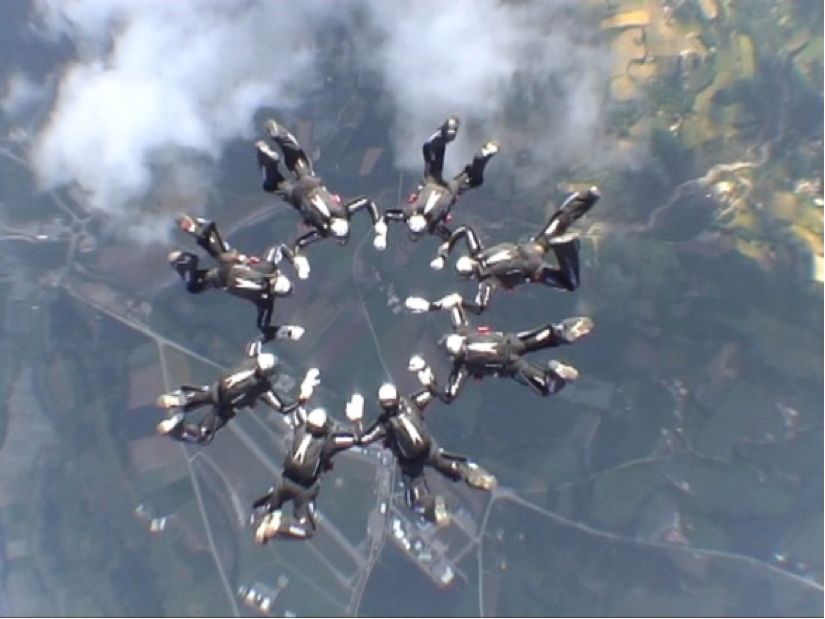
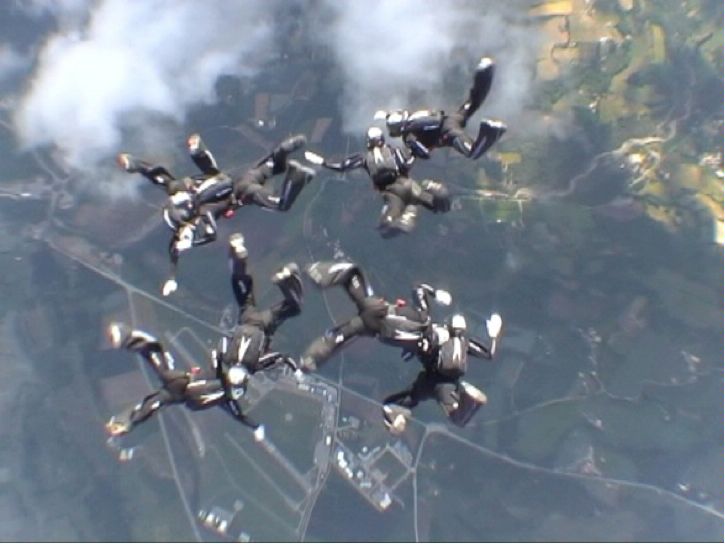
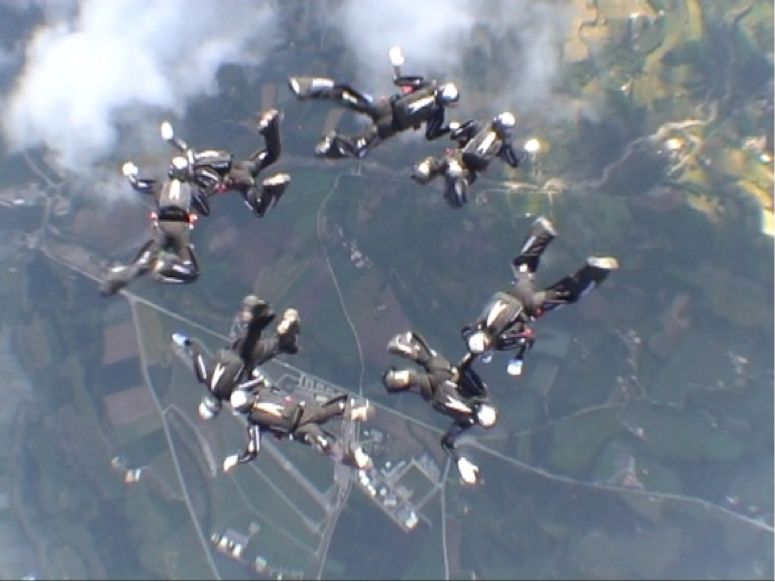
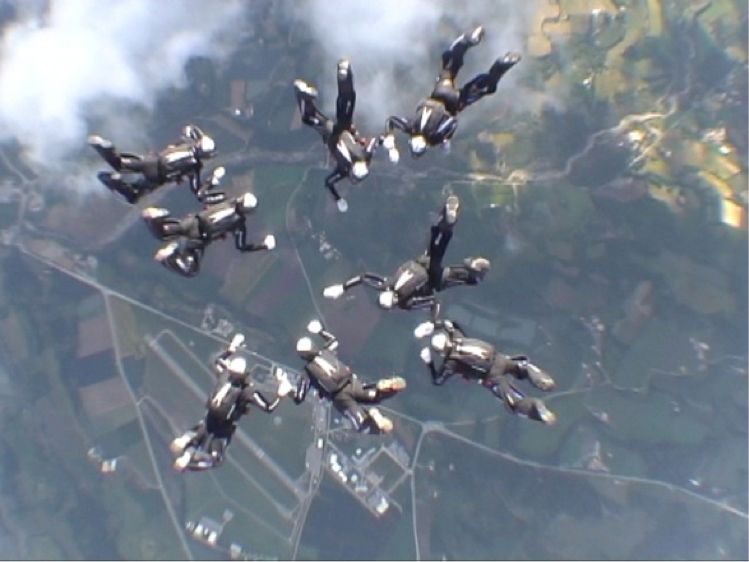
Before trying to describe the block with illustrations, arrows and text, I wanted to show the block in its major phases with still pictures of real footage of my French 8 way team, 2010. You can see these from the top photo and down the right hand side of the page. This will give you maybe a clearer idea when you will take a look at the descriptions below about the different phases of Block 6.
Color Coordination
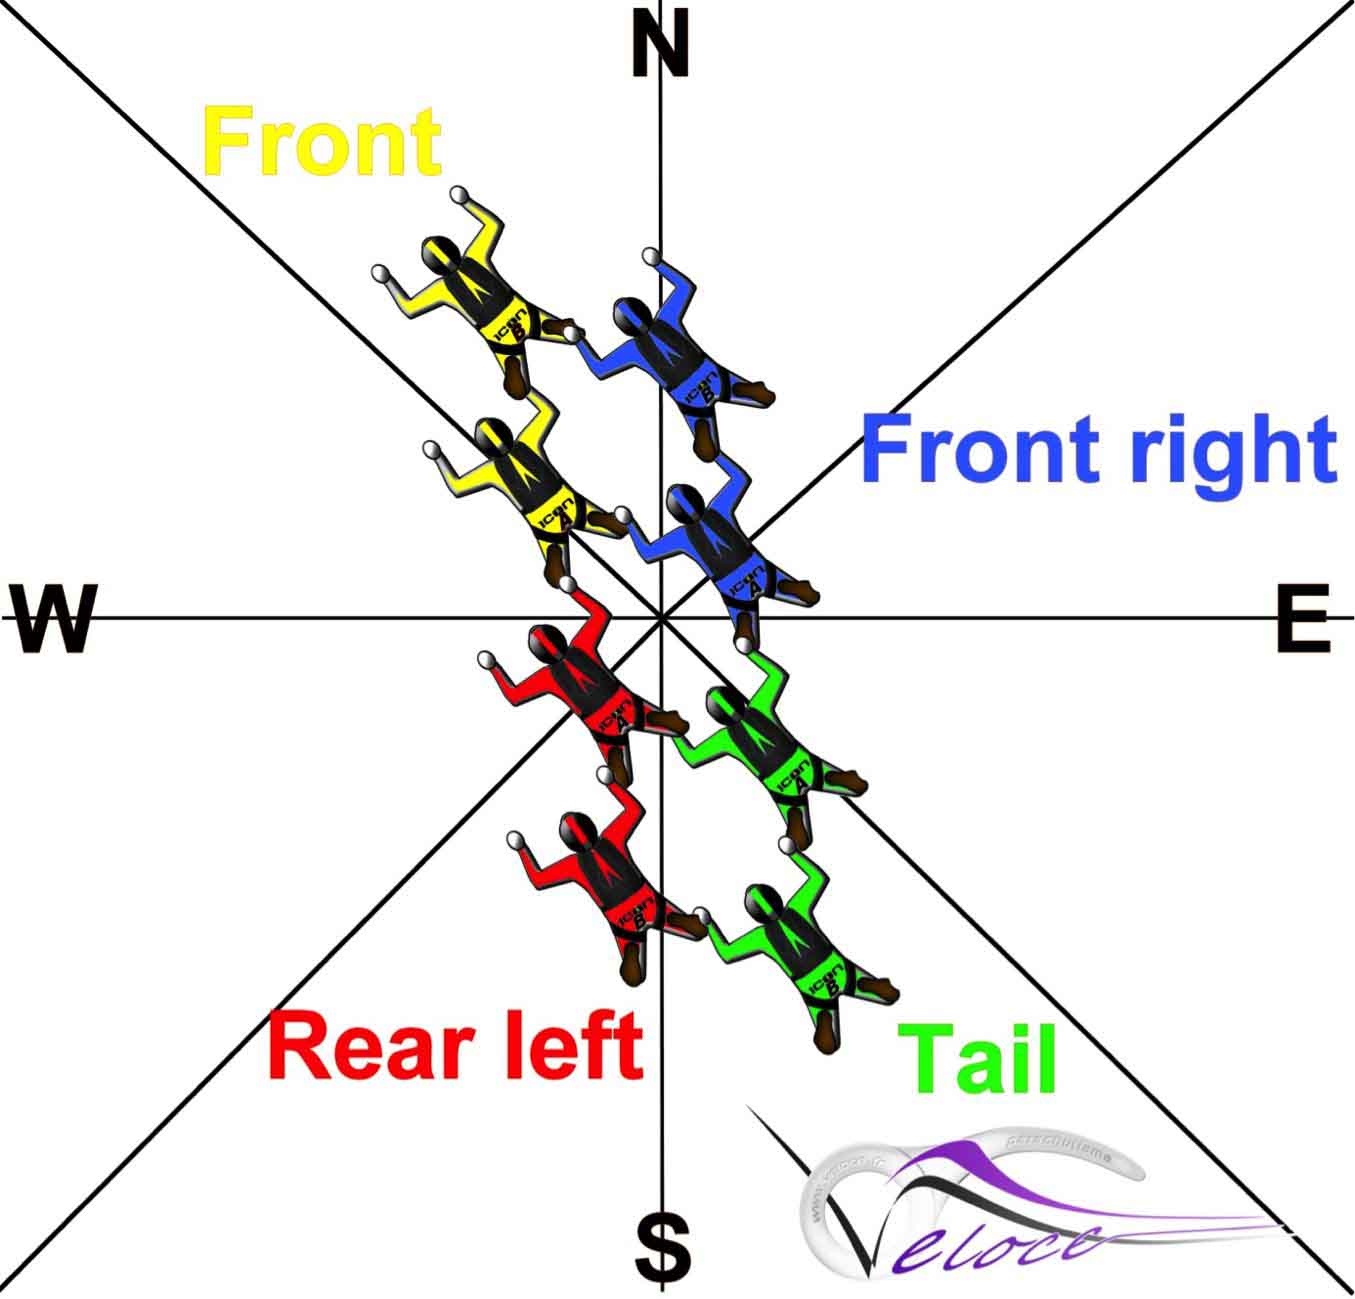
If you remember, last week I described my system to classify the jumpers as four colored pairs (A and B, outside and center persons), according to the exit stairstep, as shown on the right. This terminology is used throughout this series (recap HERE).
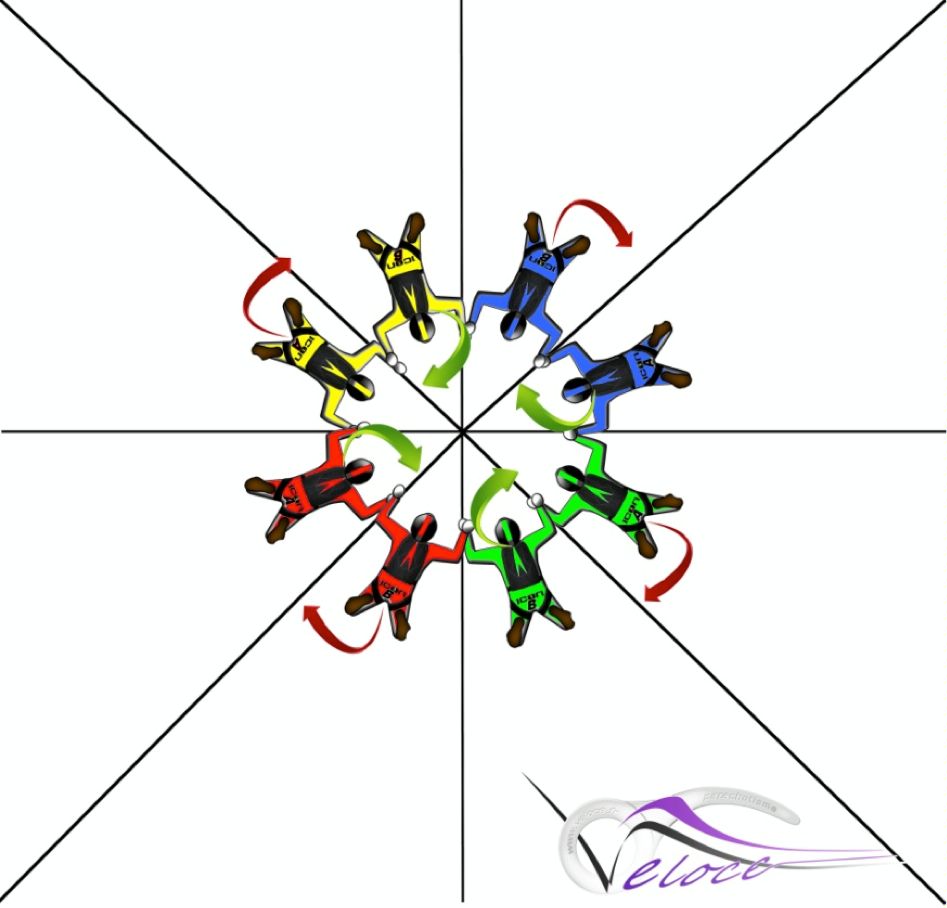
Block 6, Phase 1
Construction: is pretty simple. Just pay attention to make it as round and symmetrical as possible of course. If not, the trajectories of the pieces might be affected and not match with the general dynamic of the block.
Key: Key was usually given by Red A
Start: As the arrows show, the block starts with the insiders (A) aiming to go to their B piece partner in a divergent kind of move. So instead of moving straight forward, A will try to move towards B’s shoulder. I would suggest an upper move to do that. If B does not move, he would be overwhelmed by A. To avoid that, B has to step a little bit backward AND leftward to leave some space for A (‘open the door’). This is shown by the red arrow. So, instead of having a convergent move by making the As move forward, they are tasked to make a divergent move since they move to the outside (aiming to B’s shoulder). This is to provide more rotation and dynamism to the piece. The disadvantage is that tendency will be to move out too far. The As have to remember not to go farther than the imaginary (tunnel) wall that is right behind the knees of B. When the shoulder of B has been reached, it’s time to stop going out.
B has to step a little bit backward AND leftward to leave some space for A ('open the door')
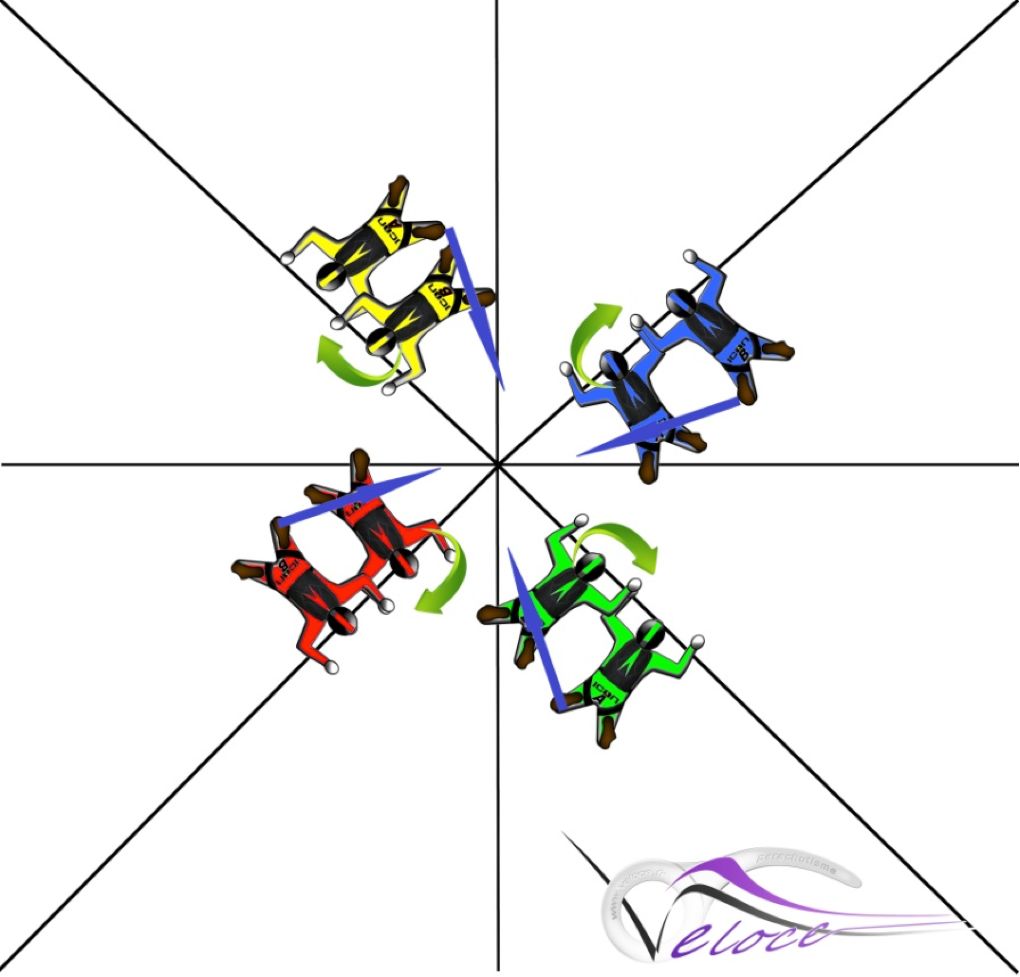
Phase 2
This picture shows the time when B has opened the door to leave A more room. B has to move into the slot of A. As you can see, at this time A has not reached yet his stopping point and has to keep moving out to go exactly at the place where B was occupying. In the meantime, after the “open the door” move, B has to start pushing sideward to the center to prepare its second phase move. Even if I use this little blue arrow, please do not think it’s to ask the B to translate to the center strongly. This blue arrow just indicates that the B guys have to maintain a left visual and some side press toward the center to avoid slipping outside due to the A move. The most common mistake for B is to head switch to the right side too soon and to fix himself. No one in the piece has to be stationary at this time.
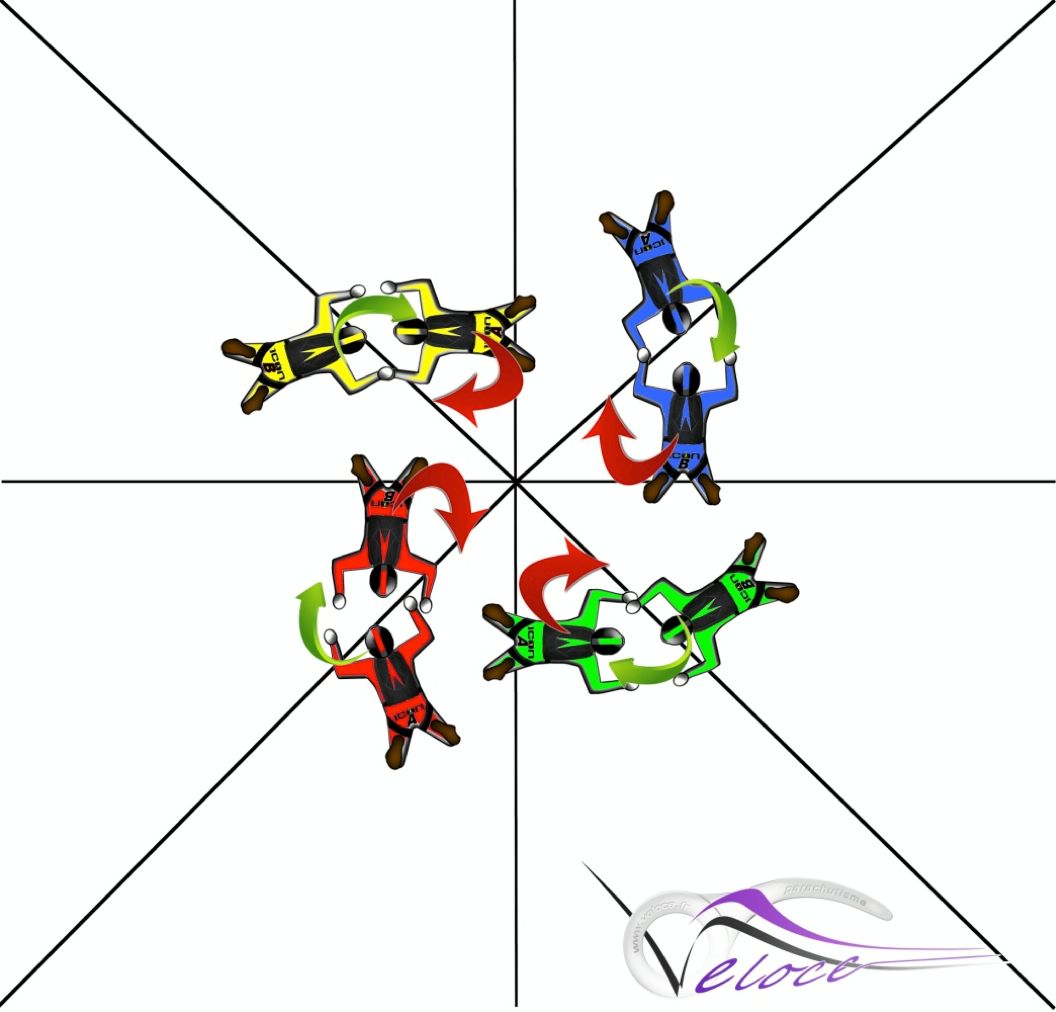
Phase 3
This picture shows when A has reached his stopping point. I have deliberately shown the A guys in a facing in and almost fully turned position at this time. Why? Because this is the solution to avoid translation of the pieces. In fact, if A stops moving too soon and doesn’t move out enough, this will oblige B to move into the formation or to translate since there is no room for him. What I have shown here is A opening the door and leaving more room to B so that he can retake his primary slot. So B is now about to rotate and retake his primary slot. To help this, A will have to turn around a little (see green arrow).
this is the solution to avoid translation of the pieces
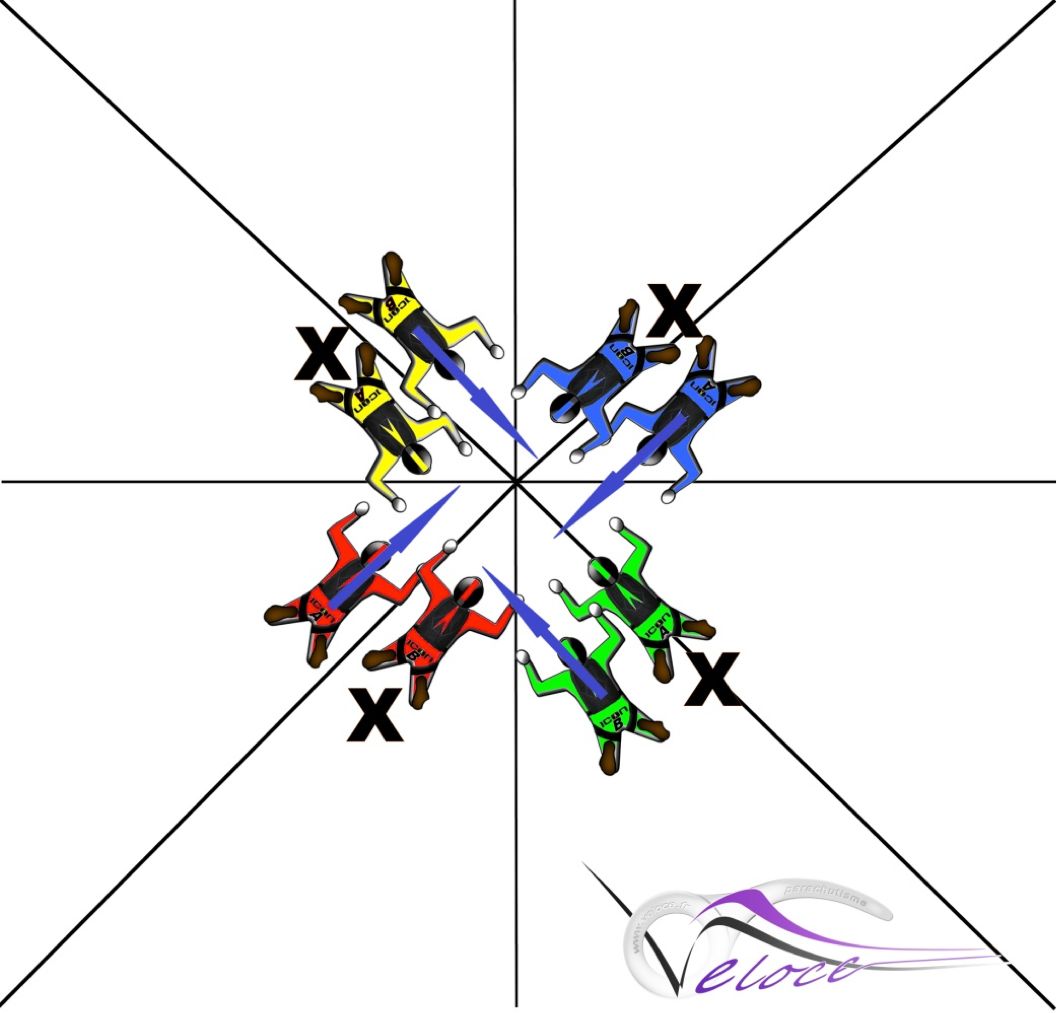
Phase 4
This is the finalizing phase! At this time, B has finished his move and has retaken his primary slot. The tendency at this time for B is to tend to move sideward and to slide toward the right piece. This is translating and this will happen a little but this is a natural move that B has to eliminate as much as possible by trying to hold his ground and face his clone to maintain level and proximity.The task of A is to aim to the grip arriving from the right side, see the blue arrow indicating this attitude. At this time, It is important for all the pieces is to fly to the centre on the same level.
It is important for all the pieces is to fly to the centre on the same level
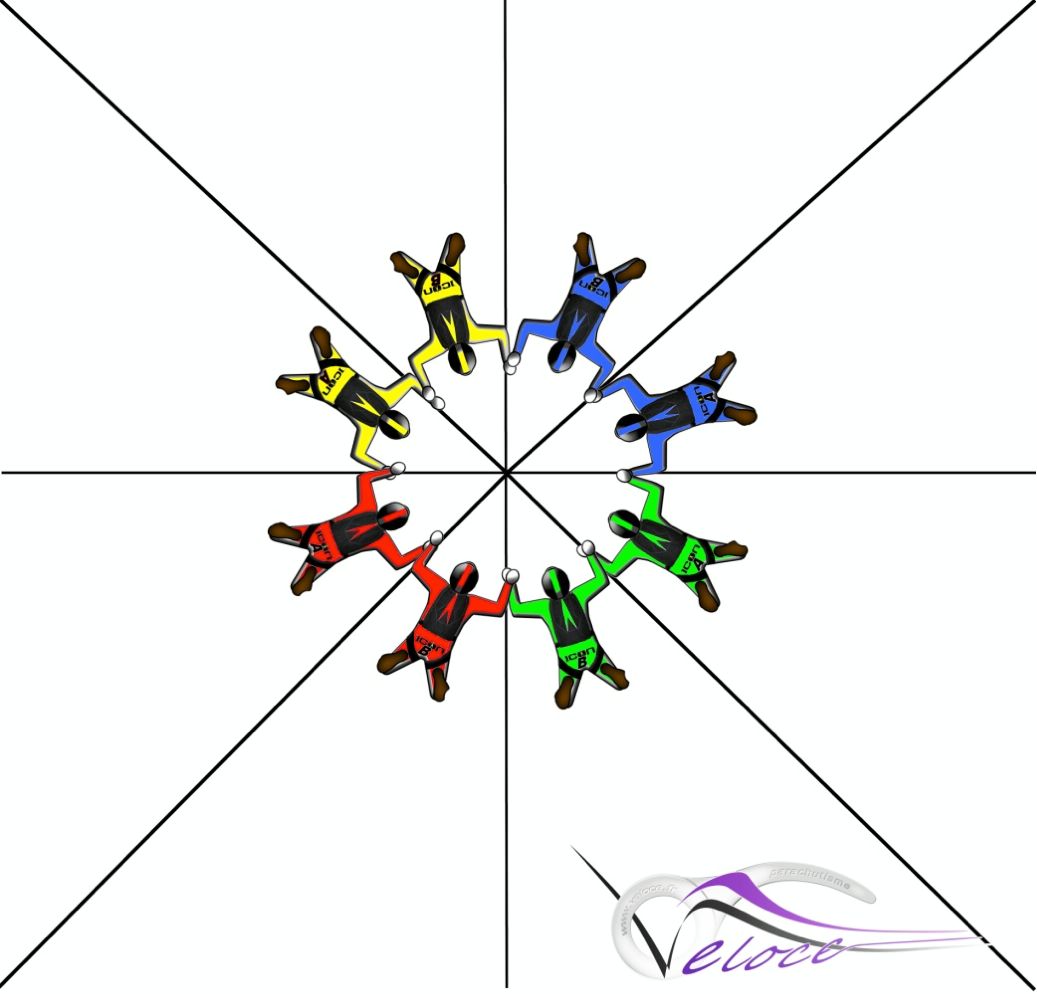
Phase 5: The photo finish
This is the end of the block. As you can see, the pieces tend to finish at the same primary spot without translating. But this is pure theory. In fact, the pieces will have a little tendency in the end of the block to translate a little to the right side. But this is due to the inertia of the B last moves. Remember, the pieces are not supposed to translate!
Remember, the pieces are not supposed to translate!
The video below is Martial describing the above technique.
Block 6 explained step by step, by World Champion Martial Ferré
Other Articles in this Series
First article in series, Making 8-way Simple
Second article, Block 5
Third article, Block 7
Get in Touch!
If you want more coaching 8-way indoor/outdoor contact Martial Ferré (martial.ferre@gmail.com) or visit his website, Veloce