



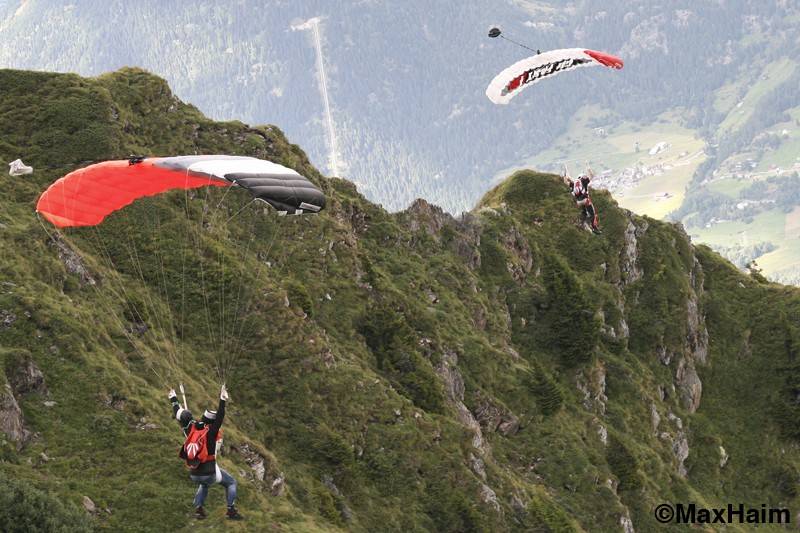
This year will see the tenth gathering at Mountain Gravity, a small, friendly boogie held at one of the world’s loveliest places to fly a canopy and play with the hillside. Various extreme speed flying routes down the mountain at Ambri have been charted to pilot a canopy close to the slopes for a whole mile to arrive at the valley.
The two runs for über experienced pilots are the Valley and the Canyon. The route and tips for the Canyon have recently been released and are described below. The guide to the Valley was described here in an earlier article. Obviously these routes are only for extremely skilled, experienced & current canopy pilots and mountain swoopers.
Of course you can’t learn to fly a mountain on the internet, this article is for entertainment & background purposes only
realize that we did some of these runs over a hundred times before going in as deep as we now do
Extreme Sport
Swooping is an extreme sport, for which in some countries you need to have more than 1,000 jumps. Adding a mountain to that sport does not make it safer. On the contrary. You should not let the desire to put your personal cool GoPro video up on facebook be the motivation to go lower or faster on a mountain than you would on a normal landing area. Remember that even just breaking a leg on a mountain can be a serious problem.
In the description of runs for expert flyers we assume that you are indeed an expert canopy flyer. Even so, you might not be a very experienced mountain swooper (because there aren’t many of those). Please realize that. Please also realize that we did some of these runs over a hundred times before going in as deep as we now do.
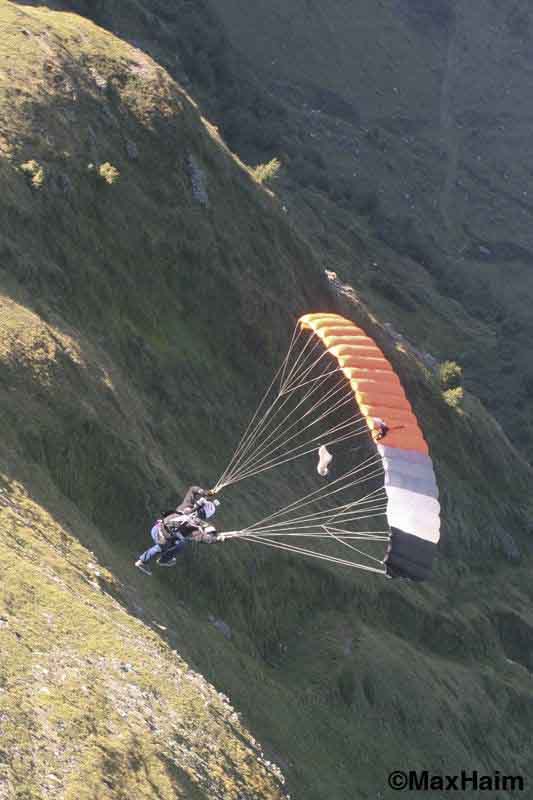
Basic Mountain Swooping Rules
We expect you to know about some basic mountain swooping rules. Here they are again, to fresh up:
1. Always know what your run should look like, even when you’re supposed to follow a guide.
2. Look at least 200 meters ahead.
3. Speed equals performance and therefore is your friend. Never fly less than full flight.
4. Approaching a ridge or flat part, always keep a margin. That’s why we never fly less than full flight. Rear risers (or occasionally toggles) are only used to give very short input, toggles are never used to flatten your glide.
5. There is no try; only do or don’t. This means, that if you’re not 100% sure you’re going to make it over a tree or ridge, you find an alternative route or landing EARLY.
6. If you feel turbulence, stay high. Even though there is probably more turbulence higher up, you want to create some margin. Keep your cell pressure, so fly fast.
As always, the most dangerous flyers are the ones who overestimate themselves.
The Canyon
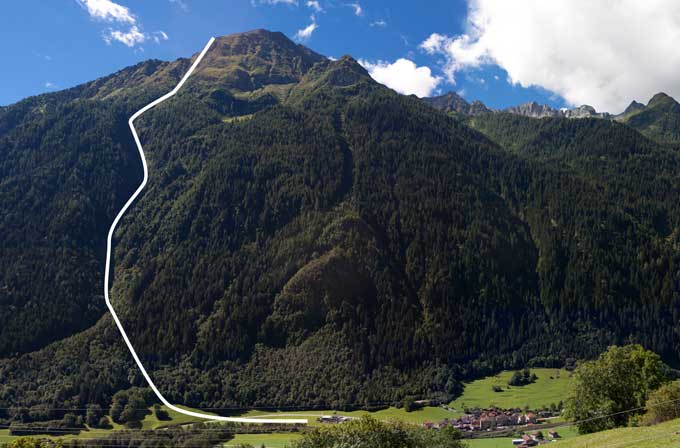
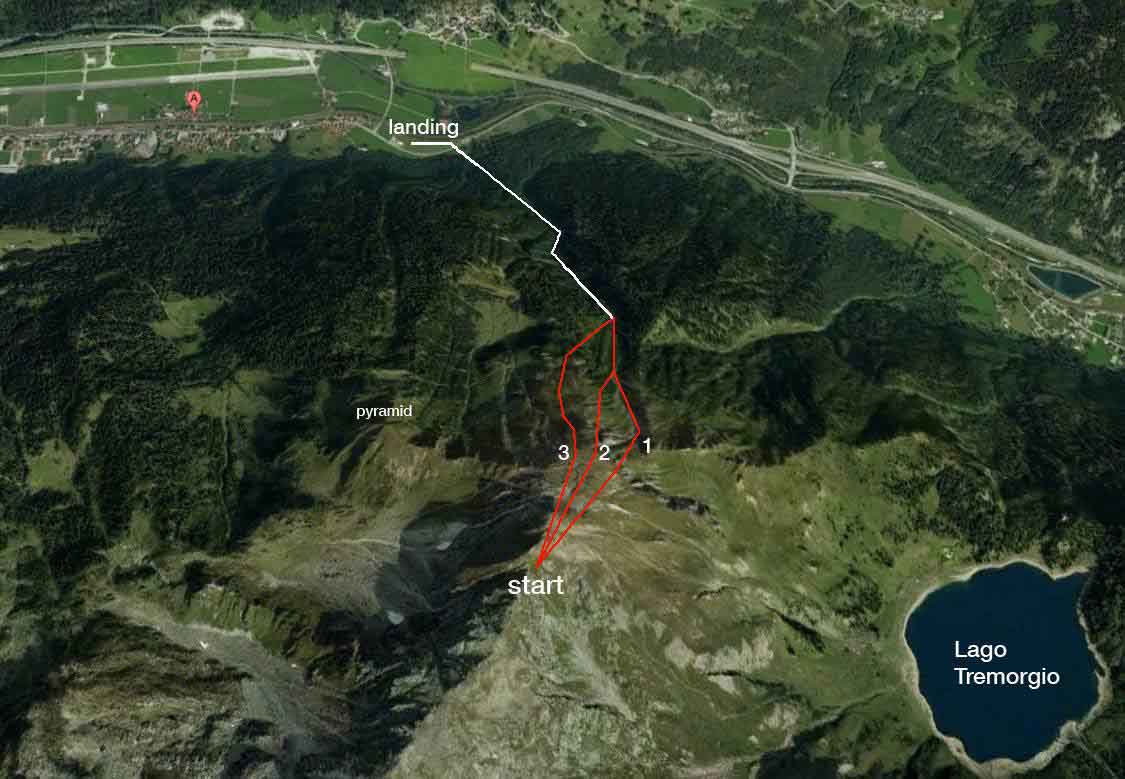
For this run you can start all the way at the top of the mountain at 2,650 m which gives you a 5,500 ft mountain swoop! With Lago Tremorgio (the little round lake) on your right hand, you fly straight towards the main valley.
There is no try; only do or don’t
We’ll divide the description for this run into
3 segments:
1. The Scottish Highlands
2. The Crack
3. The Exit + Landing
Obviously, the crack is quite engaging, and you need many runs and general mountain swoop experience to fly it smoothly. Strangely enough, the exit is where people make mistakes. So stay alert, specially after coming out of the canyon! By then, playtime is almost over and your arms are tired so you’d better gain some altitude and prepare for a safe landing.
Canyon Part 1 – Scottish Highlands
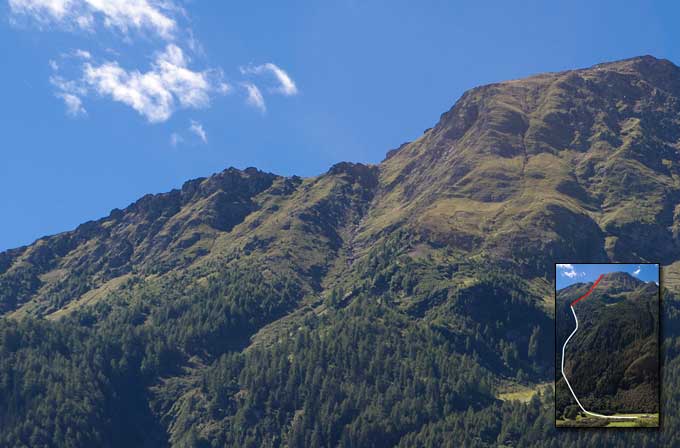
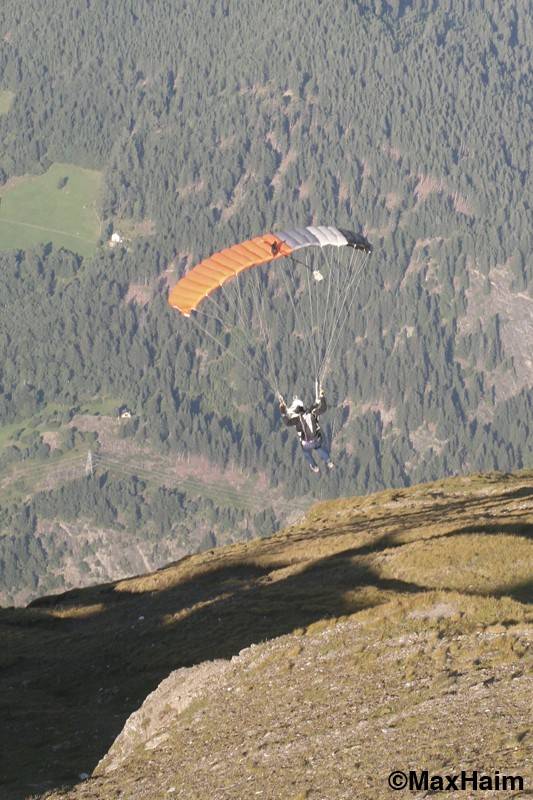
When the visibility is clear and the winds are good, try starting your run all the way at the top of the mountain. The top part is one of my favorites, even though most people choose to start about 100-200 m downhill. Set up right over the highest point and remember that you’re at 8,500 ft above sea level, so take some extra margin if you’re starting your approach with a front riser or harness turn.
With Lago Tremorgio on your right hand, you fly straight towards the main valley. The short ridgeline at the top soon changes into a plain – The Scottish Highlands. This is a grassy and rocky field with the perfect angle to keep on swooping. From here there are a few options… I’ll describe 3 of them (shown in red on the photo).
1. Go straight
Go straight on… When you fly over the edge, you’ll see the lake on your right hand side; and right in front of you there is a clear gully turning 45 ̊ left. Follow this gully or if you’re a bit higher, follow the shoulder on the opposite side. WATCH OUT: there are actually 2 valleys to choose from. The one on the left leads to the crack (part 2 of this run). The one on the right is not surveyed during the Mountain Gravity, so don’t go there. If you find yourself there by mistake, keep extra altitude (because the run is flatter) and prepare for a sloping landing area with ditches in it.
2. Go a bit left
If you keep a little bit left on the first plain, it turns into a ridge again. You can follow this ridge all the way to the trees. I find it the least interesting option but strangely enough it’s the one that is flown the most.
3. Go left a bit more
This is my favorite option because with the right type of steering and wingloading, you can keep skimming the grass all the way until the entrance of the crack! If you keep left on the first plain, you end up just left of the ridge from the previous option; we’re talking 3 meters. Here the grass plain continues, with a small gully to lead the way. If you follow this gully with slow harness turns – provided you have both the swooping skills and mountain experience to do this safely – it feels like the endless swoop. Coming to where the small trees begin, turn right into the valley that leads into The Crack.
you need a lot of mountain flying skills and to know the canyon like a formula 1 driver knows his racetrack
Alternative: If you keep going straight at the end instead of turning right, you can fly all the way down over the trees and skip the crack. It gets flatter here at first, so keep your altitude. Don’t fly back towards the right because you might meet others flying the traditional line through the crack. WATCH OUT: If you follow the wrong gully (more left) you’ll end up over a large flat grassy part where you have to stay very high to make it over the small road at the end.
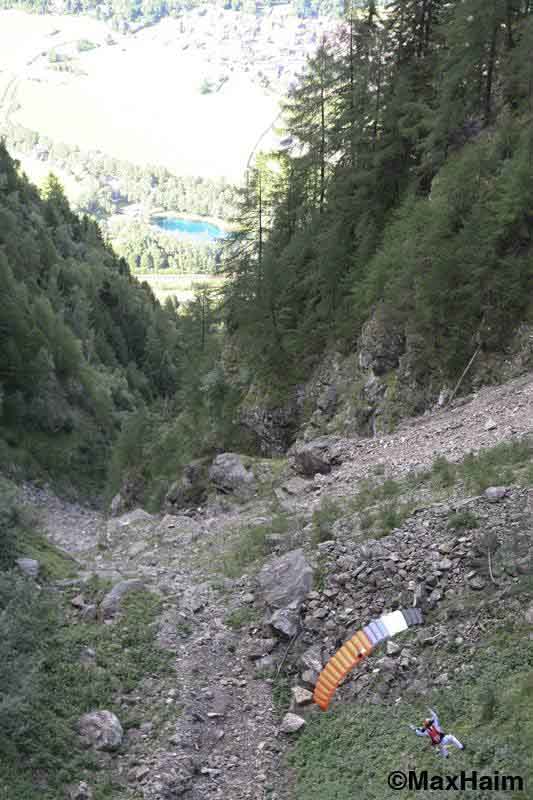
Canyon Part 2 – The Crack
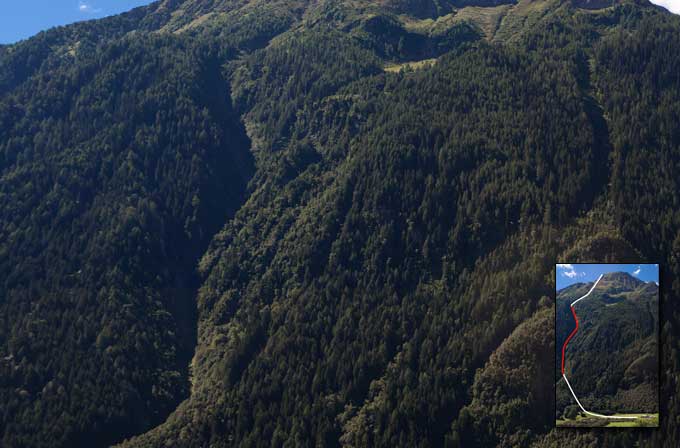
As long as you take it easy, flying the crack is quite doable. The canyon is steep, so at any point you can decide to go straight and fly out of it. As there is less space left and right, be aware of burbles and keep distance from the ones flying in front of you.
If your desire is to go down low, it becomes the more engaging part of the run. You’ll have to swing harness turns to lose altitude. This increases the risk of snatching a tree with your end cells or swinging too far out of a turn, possibly resulting in terrible situations, especially down low, where the canyon becomes very narrow. To maneuver here you need to have a lot of mountain flying skills and you need to know the canyon like a formula 1 driver knows his racetrack.
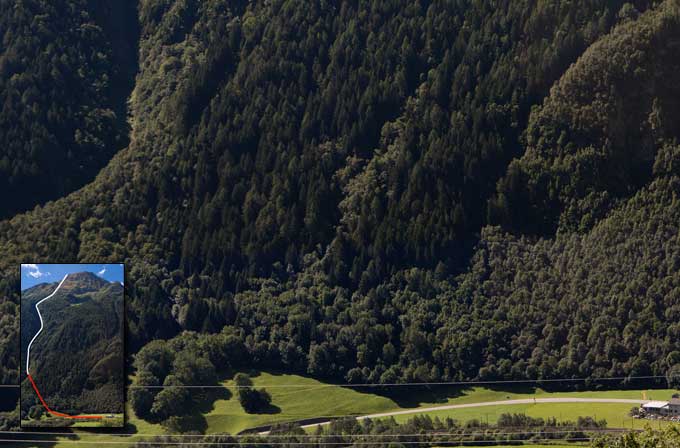
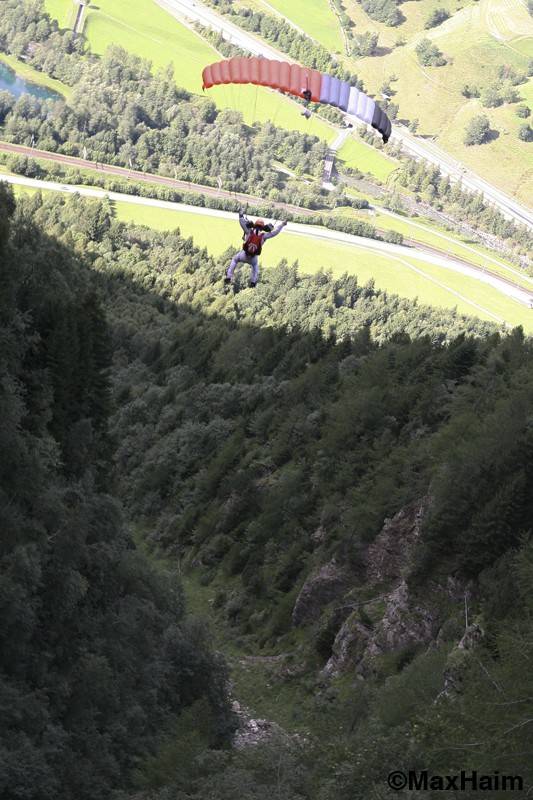
Canyon Part 3 – Exit and Landing
When you start to see grass at the bottom of the canyon, start gaining some more altitude and fly out. Strangely enough, this is the part where people tend to make mistakes. Going too far left and playing around with the trees can result in a painful tree landing. Your arms are tired by now and the terrain is getting flatter so it’s time to prepare for a safe landing instead. Unless agreed otherwise with your guide, coming from the canyon, you’ll always cross the road, make a 90 ̊ turn left and land parallel to the road in a western or north-western direction.
Time to count if everyone made it down safely and wait for the trailer to pick you up.
YOU Gravity
See Mountain Gravity Website to upload a video of your flight down &/or vote for the best
More photos at: Mountain Gravity Gallery