
How can you help your canopy to open better?
Many factors determine the way your canopy opens. The design of the canopy and the way it is packed are two important factors, but body position also plays a major role.
We learn to deploy our canopies in a basic, stable position as students, and many of us don’t give this skill much more thought after that. Unfortunately we sometimes develop a few bad habits that have a negative effect on our openings. Even after making thousands of jumps, people have been surprised to find that a few small adjustments to their body position during deployment can significantly improve their openings.
This article is about deploying a parachute, the most important thing you do on every skydive. It might be a good idea to practice these techniques on the ground before trying them in the air. You might even want to make a solo jump and try some practice pulls using these techniques before it’s actually time to deploy. If you are not a B Certificate skydiver yet, you should discuss this article with your instructor before trying anything you read here. He or she may want you to focus on more important skills, like altitude awareness and basic stability, rather than adding anything new to your pull sequence.
No Need For Speed
The speed you are falling at when you deploy your canopy can have a large effect on the forces generated during the opening. As your airspeed increases, these forces also increase. Many of today’s canopies are designed for relatively slow openings, and some will not be affected greatly by a little extra speed at deployment time. Some jumpers even find that their canopies open better when they are falling a bit faster. This is not something you should take for granted though. Higher airspeeds might not cause a canopy to open hard as long as everything else is just right, but small variables tend to have greater effects at higher airspeeds. If you rush your pack job one time and let things get a little sloppy, or if your canopy is starting to go out of trim, extra airspeed could make the difference between an opening that is slightly abrupt and one that really hurts. Slowing down before you deploy can provide a greater margin of error and reduce the effects that other variables have on your openings.

Image by Marat Leiras
Slowing Down
Slowing down can be especially helpful if your openings are frequently or even just occasionally faster than you like them to be. The popularity of freeflying has made slowing down before deploying even more important. Whenever you fly head-up or head-down, it is important to leave yourself plenty of time to get back on your belly and slow down before you pull. Both beginners and experienced freeflyers should keep this in mind when planning their dives. If tracking at the end of a jump, regardless of what type of skydiving you are doing, it is generally best to flare out of the track and slow down before you deploy. To flare, spread your arms and legs and dearch slightly for a second or two just before you wave off. This will help bleed off any excess speed. Keep your arms and legs spread out and maintain a slight dearch while you wave off, remembering to look around for other jumpers. As you finish your wave-off and start to pull, relax back into a normal arch. If done correctly this doesn’t take a significant amount of time and becomes a natural part of deployment.

Image by Marat Leiras
What Are You Looking At?
Take a moment to notice where you are looking while you reach for your pilot chute. If you jump with a video camera, look at some of your openings on tape. What do you see in the video as you pull? Are you looking up at the horizon or down at the ground below you? Looking down at the ground tends to put you in a slightly head-low attitude. This can increase your speed slightly. It can also amplify the opening force your body feels, since this force will mainly be transmitted to your shoulders when the canopy reaches the end of the lines. Also, your legs may swing through a wider arc as the canopy sits you up in the harness, making the opening feel more abrupt. As you reach for your main deployment handle, try lifting your head up and looking out at the horizon instead of down at the ground. This puts you in a more head-high attitude. The opening forces will be transmitted farther down through the harness instead of being concentrated at your shoulders. Looking at the horizon also helps keep your shoulders level as you pull.

Image by Marat Leiras
Keep It Even
Most licensed jumpers use hand-deploy main pilot chutes, and these are becoming more common on AFF student equipment as well. Those of us who were trained with ripcords and springloaded pilot chutes were usually taught to look for the ripcord handle before grabbing it. We were also taught to look over one shoulder and check after pulling the ripcord. Looking over your shoulder changes the airflow over your back and helps clear pilot chute hesitations, which were common when using a springloaded main pilot chute. Even if years have passed since transitioning to a hand-deploy pilot chute, many experienced jumpers still have the habit of looking for their pilot chutes after they throw them. Unfortunately it’s almost impossible to look over your shoulder and keep your shoulders level at the same time. Looking over your shoulder also tilts your container to one side. Having your shoulders and container tilted as the canopy deploys can cause off-heading openings, line twists and even hard openings. Although large, docile student canopies may not be offended if your shoulders and container are uneven, more responsive sport canopies will be much happier if you keep your shoulders level. Most have pilot chutes mounted on the bottom of the container, so trying to look for the handle is useless. Even if you still use a legstrap pilot chute, you probably can’t see the handle very easily in freefall. Since hand-deploy pilot chutes are thrown into the clean air next to your body, hesitations are rare so checking over your shoulder every time isn’t necessary. It is much better to look at the horizon as you reach for your pilot chute and continue looking at the horizon as you throw it.

Image by Marat Leiras
Levelling It Out
After throwing the pilot chute, bring your arms back into a neutral freefall position and think about keeping your shoulders level as the deployment bag lifts off of your back. You can also push your hips down slightly and bend your knees just a bit, as if you were in a very slow backslide. This keeps your head and upper body high. Some jumpers have recommended sitting up during the deployment. This can actually work well as long as it is done correctly, but if you sit up too much or too soon there is a risk of increasing your airspeed or even becoming unstable. Simply lifting your chin, looking at the horizon, arching a bit more and relaxing your legs slightly has a similar effect to consciously sitting up and you’re less likely to overdo it. Side-mounted cameras are fortunately pretty rare these days. If wearing a side-mount, some used to believe they had to keep their heads down when deploying, to prevent a riser from hitting the camera. This might be an issue if you have narrow shoulders, wear your chest strap very tight, or if your camera sticks out; however a better solution is not to jump a side-mounted camera, or keep it as small, streamlined and snag-free as possible. Whatever else, keep a good arch, relax your lower legs to keep your shoulders higher than your hips and focus on keeping your arms and shoulders level in the relative wind.

Image by Marat Leiras
Back In The Saddle
As soon as the canopy sits you upright in the harness, try putting your feet and knees together for the rest of the opening. Putting your legs together helps keep your weight even in the harness and reduces the chances of an off-heading opening. This is especially effective if you are jumping an elliptical-type canopy. Just the weight of your legs swinging or a small shift in the harness can cause some of these canopies to start turning. If you grab your risers as the canopy is opening it’s best to hold the lower part of the risers, just above the 3-ring. If you take the risers up near the toggles you might cause a turn by unintentionally pulling one riser or releasing one brake. If you hold on to the bottom of the risers, you can still slide your hands up quickly to steer with the risers or release the brakes if necessary. Some jumpers try to keep their openings on heading by actively steering with rear risers while the slider is still up against the canopy. This works with some canopies but others don’t like it at all. You may get better results if you just relax, sit still, focus on keeping your weight even and wait until the slider starts to come down before making any corrections with the risers.
Watch Where You’re Going
In a first jump course we are taught to check our canopies to make sure they open correctly. Although this is important, it can create a very bad habit later on. Many jumpers look up at their canopies as soon as they start to open and continue watching the canopy through the entire opening sequence. Some people continue looking up for several more seconds while they collapse their sliders and release their brakes. If another person opens close to you, you may only have a second or two to react in order to avoid a collision. Staring at your canopy for five or ten seconds after you deploy is like driving down the highway while staring up at the roof of your car.
Track the Deployment Sequence
Fortunately, a few techniques can help you change your habits for the better, and put you more in touch with your openings. Many students are taught to carry out a safety count out loud while their canopy deploys. If you’ve stopped doing this since getting qualified, It’s a good habit to get back into, and can help you keep track of time during the deployment sequence.

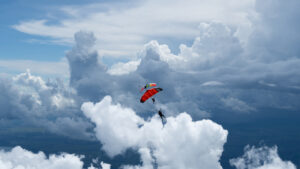
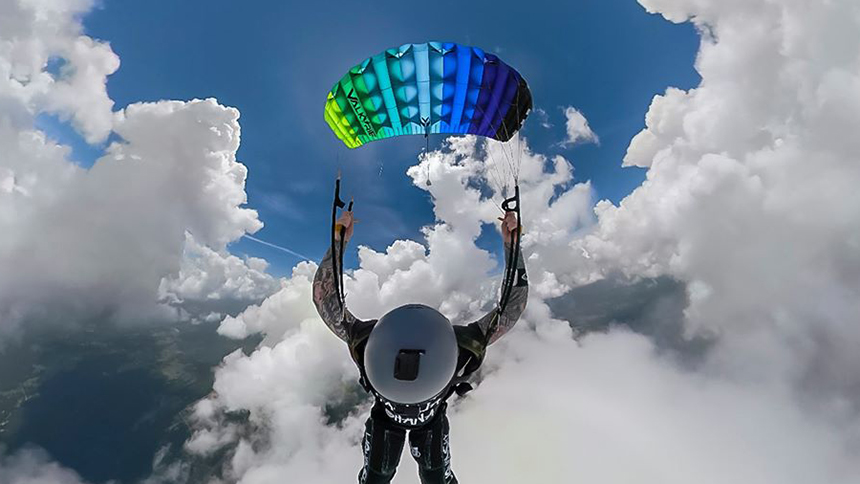
Image by Norman Kent
Stage 1: Snatch Force
You will hear and feel different things during each stage of the deployment. A second or less after you throw your pilot chute, you should feel the snatch force pull you upright in the harness. This is the force of the canopy fabric hitting the relative wind as it comes out of the deployment bag.

Image by Norman Kent
Stage 2: Snivel
The canopy will then snivel. The snivel is the portion of the opening where the slider stays against the bottom of the canopy, reducing your airspeed before the canopy starts to inflate. There will still be a lot of wind noise during the snivel, and you will still have a sensation of falling. This may last for a second or two, or even for several seconds.

Image by Norman Kent
Stage 3: Inflation
The inflation occurs as the cells fill with air and the slider moves down the lines. Things become quieter once the canopy inflates. Even under a canopy that inflates very slowly and smoothly, you will still feel the transition from falling to gliding. You may also hear the slider flapping above your head once it comes down.
Listen to Your Senses
Once you become more aware of these sensations you will find that your other senses can tell you as much about your opening, if not more, as your eyes do. Soon you will feel comfortable looking out in front of you during the entire opening, rather than watching the canopy. This allows you to look for other jumpers, and many people find this reduces off heading openings.
But if I don’t watch my canopy, how will I know if I’m having a malfunction?
Take it from someone who’s cut away a number of misbehaving canopies; you’ll probably know right away! If you’re having a malfunction, they tend to feel very different from a normal opening and you will most likely know something is wrong before you even look up. If you start to count after throwing your pilot chute, and reach ‘two thousand’ or ‘three thousand’ without feeling the snatch force, there is obviously a problem. This would be an acceptable time to look back over your shoulder and check for a pilot chute hesitation or pilot chute in tow. Once you know how many seconds the snivel usually lasts on your canopy, you will also know if that part of the opening is taking longer than normal. You can usually feel line twists right away, and if you start spinning wildly you’ll surely want to take a look up at your canopy and see what’s bothering it.
Staring at your canopy for five seconds after you deploy is like driving down the highway while staring up at the roof of your car
scott miller
What if the opening feels perfectly normal?
Unless you need to avoid another jumper right away, you should still look up and check your canopy right after it inflates. You might not notice a tear, broken line or similar problem until you look. Even in these situations, if the opening felt normal then the canopy is probably flying well enough to give you a low rate of descent. Assuming you deployed at a reasonable altitude, you should have enough time to do a control check and execute emergency procedures if necessary.
Summary
If you’ve been watching your canopy open every time then you might not feel ready to stop doing this during your very next jump but you should start developing better habits as soon as possible. Start counting when you throw your pilot chute and notice how long each stage of the deployment sequence takes. Pay attention to what you are hearing and feeling during the opening. Soon you won’t need to watch the whole deployment, and will be able to pay more attention to your body and your surroundings.
Improving your body position and increasing your awareness when you deploy your canopy can produce great results. You might not remember everything here during your next jump but at least think about trying these suggestions one at a time, at your own pace. You might be amazed by the difference a few small changes can make.
Photo Credits
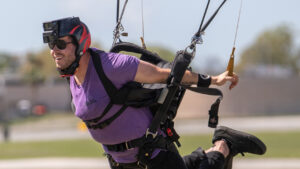
First series of photos by Marat Leiras, of Jeff Gladish deploying
Second series of photos by Norman Kent, who is sponsored by Performance Designs